Nasco’s Line Designs Sculptures

8th Grade
STEM 
Students will turn line designs into original sculptures by drawing lines, textures, and patterns on paper; cutting and rolling into tubes; and gluing tubes together to create 3-D structures. Encourages class discussion of types of lines, textures, designs, patterns, movement, and balance.
Click here for directions:
Line Designs Into Sculpture


fabric bowls

High School Creative Crafts


http://asubtlerevelry.com/fabric-bowls

These pretty fabric bowls are perfect for holding keys at home or favors for your next party. They would be an adorable take on an Easter basket filled with goodies this spring, or a nice gift for mom filled with a few sweet trinkets for Mother’s Day. Any coordinating mix of fabric will work for the bowls which makes each one unique.

http://asubtlerevelry.com/wp-content/uploads/2012/03/fabric-bowls.jpg
http://asubtlerevelry.com/wp-content/uploads/2012/03/FabricBowlsstep-3.jpg
http://asubtlerevelry.com/wp-content/uploads/2012/03/FabricBowls-step-4.jpg

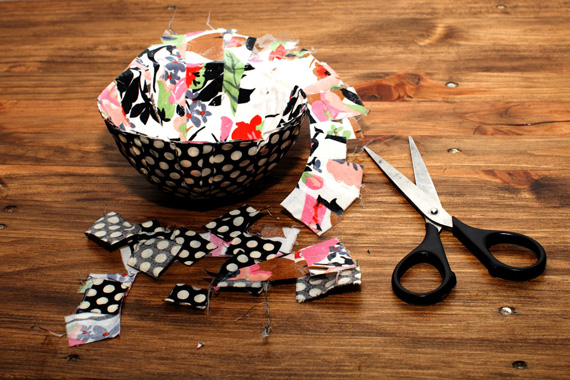
The bowls have quite a few steps but are super easy to put together. You can make a stack of them assembly line style in a very short time! You will need; a variety of fabric strips cut about 1” wide and long enough to cover the bottom of your bowls, an assortment of different size bowls, plastic wrap, pre-made fabric binding, glue,  tacky glue and scissors.

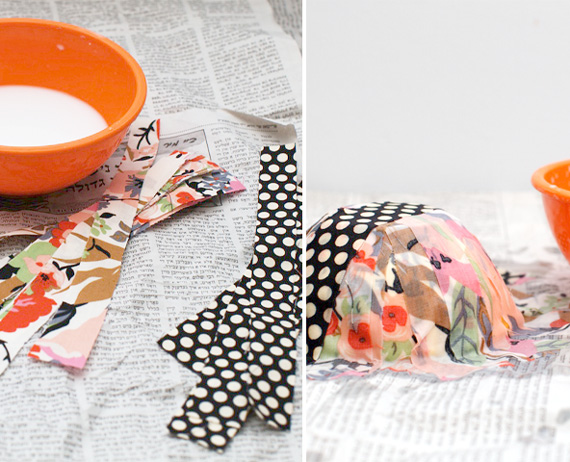
To make the bowls, mix equal parts glue  and water and cover the bottom of one of your bowls with plastic wrap. Pick one fabric for the inside of your finished bowl and one fabric for the outside. Try using coordinating patterns!

Soak fabric strips for the inside color of your bowl in the glue mixture for a few minutes. Place the first strip over the bottom of the plastic wrap covered plastic bowl. Make sure to place the RIGHT side of the fabric DOWN. Continue placing the strips all around the bottom of the bowl until it’s completely covered. Soak the fabric strips for the outside of your bowl in the mod podge mixture for a few minutes. Place these strips over the first color with the RIGHT side of the fabric UP. Continue overlapping strips of fabric. When the whole bowl is covered, let dry overnight.
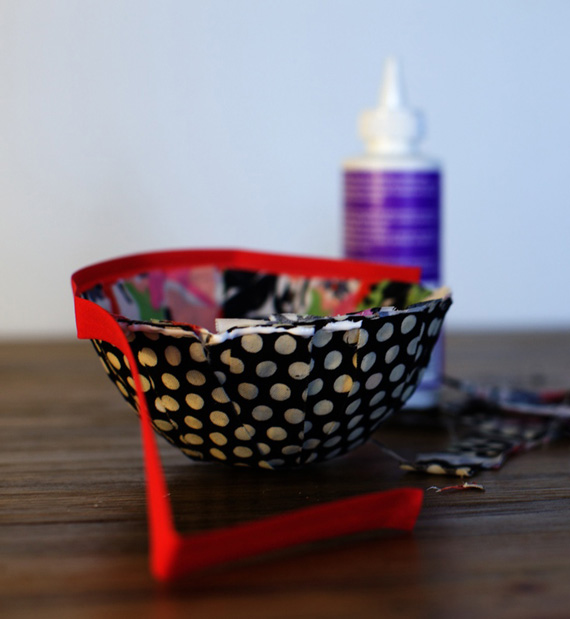
Gather your scissors, tacky glue, and fabric binding. Cut all of the selvage off of the edge of your new bowl, creating an even edge and even it out a bit if necessary. Cut a strip of binding long enough to edge your whole bowl. Starting at one end of the binding, adhere the inside edge of the binding to the outside edge of the bowl.

Continue all the way around. Place a line of tacky glue right at the top edge of the inside of the bowl. Fold the binding over to the inside of the bowl. Glue and fold all the way around.

Clay Scentsy Diffuser

8th Grade & High School Creative Crafts

Essences ceramic diffuser

http://arteascuola.com/2012/06/essences-ceramic-diffuser/
June 9, 2012 by Miriam 2 Comments
Building with coils, the essences ceramic diffuser must be large enough for a candle. You can build the container for the candle and the cup for the essences separately and then you can join them. When the clay as hard as leather you can cut the opening for the candle and some openwork decoration behind.
After the first firing you can decorate with engobe and glaze with transparent glaze. The diffuser is ready for the second firing in the kiln.

Two Salmon River Middle School students won 2nd place awards at the 1st Annual North Country Art Teachers Association Regional K-8 Art Show

Two Salmon River Middle School students won 2nd place awards at the 1st Annual North Country Art Teachers Association Regional K-8 Art Show that was held on Thursday, March 19th, 2015 at the BOCES in Canton, NY. There was a terrific attendance estimated around over 600 people. There were 14 districts represented from St. Lawrence and Franklin county, 25 art teacher K-8th, and each school could submit 16 artworks. Cady Wells a 7th grader won 2nd place in the collage category and Ashley Ghostlaw a 8th grader won 2nd place in the sculpture category. Great job girls! 


Jazz band Pop-Up

High School Creative Crafts

Jazz band Pop-Up

http://arteascuola.com/2012/04/musicians-pop-up/#comments
A simple Pop-Up that is possible to make with children: the “Jazz band” is a stair cut from an  old score, you just follow the instructions  drawn on the  sheet of squared paper, and glue some black silhouette (musicians, dancers, singers…) to have your personal concert!

Cut just the BLACK lines. You fold externally the REd lines and fold internally the GREEN lines.